
When cutting your hair, there's not just one way to cut; instead, there are various methods to pick from to make different hairstyles. Here we will discuss the different cutting methods that are used in the industry of hairdressing.
The most commonly used hair cutting techniques by professional hairdressers in salons and barbershops include:
- Blunt Haircutting
- Scissor-Over-Comb Haircutting
- Slide Haircutting
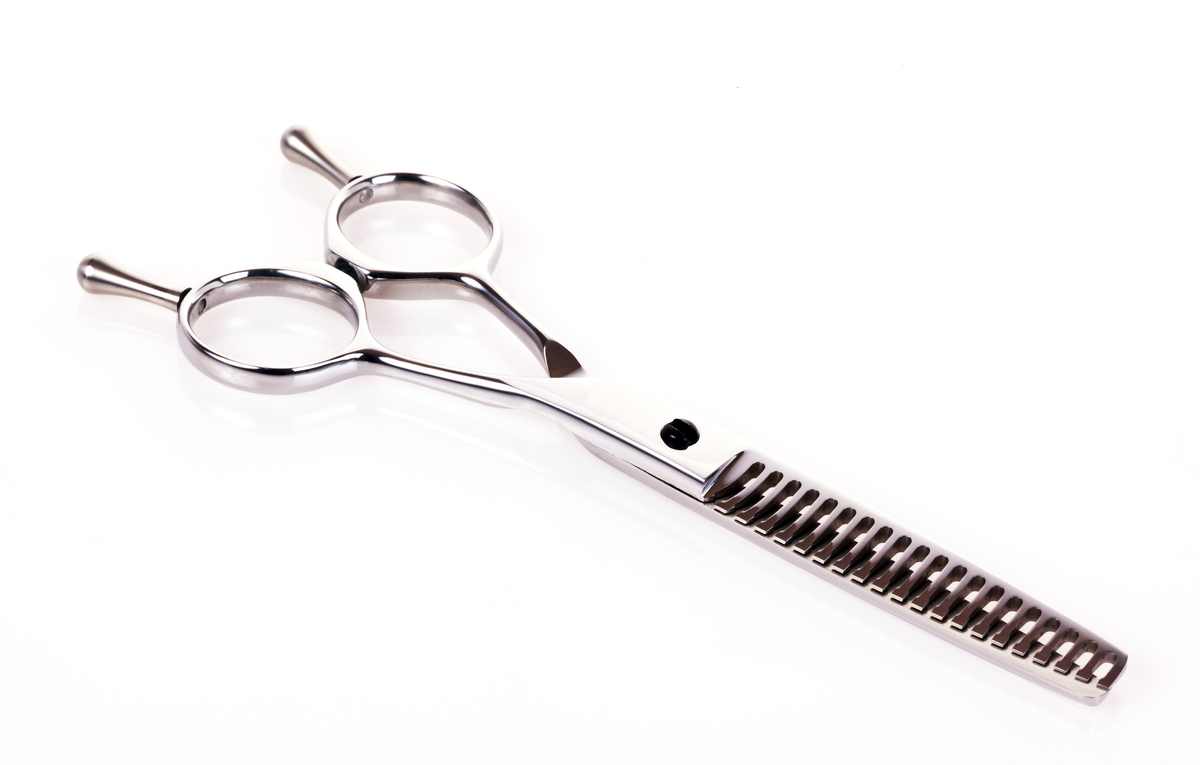
- Thinning Hair Techniques
- Texturizing Hair Techniques
- Freehand Haircutting Techniques
In this article, we will cover the basics on everything you need to know about haircutting techniques in the salon, barbershop, or even at home!
Here is the complete list of haircutting techniques we cover in the below article! Click one to jump straight to that specific technique.
The Basics Around Haircutting Techniques

A good haircut is the pillar of fashion and takes a little skill. It is possible to consult professionals or learn how to cut your own hair yourself.
Whatever the length shorter your hair There are tricks to cutting hair to ensure that you get the perfect cut every time.
1. Blunt (Club) cutting
It is often called "blunt" cutting. It's typically used to cut you want to cut the top of your hair, or the sides are cut. The portion of hair you want to cut is pushed away from the head and then cut from the tips.
Read more about Blunt or Club hair cutting techniques here!
2. Scissor-over-comb
Scissor Over Comb is a method of hairdressing that uses the clip over comb to guide the cutting areas that there is a place where the hair is too long for an appropriate guide for a finger. It is usually in the areas near the ears or in the nape region.
Read more about the scissor over comb technique favoured by hairdressers and barbers here!
3. Slide Cutting
Utilizing shorter blades could cause slide cutting to become more complicated and long-lasting. The longer blades will eliminate these issues as they permit you to insert the blades into the hair without the need for you to maneuver the hair by hand.
Read more about the slide haircutting technique here!
3. Point Haircutting
Point cutting can be among the hair cutting methods that can differentiate the boring haircut from the thrilling one.
It is used for point cutting to texture the hair and cut thick strands that are bulky from the edges , creating distinct layers that let the hair blend flawlessly and appear stunning.
The point cutting technique is suitable equally well for male and female hair styling. Based upon the texture of hair and its thickness the point cutting technique is employed on both wet and dry hair and can be used to improve any hair form or style that doesn't seem to be appropriate.
Read more about point haircutting techniques here!
4. Thinning
It is possible to thin the hair by cutting it with scissors or the use of a razor. The reason we typically reduce the thickness of hair to reduce the volume of hair for softening the appearance of a hairstyle that is new or to boost the volume of the hair at its root.
Read about how to use hair thinning scissors to thin out thick and coarse hair here!
5. Freehand
Freehand isn't a technique by itself but rather employed at the discretion of a hairdresser. For instance, taking the characteristics of the head as a guideline, you could make straighter guidelines for your first one by using a freehand cutting technique.
Read more about the freehand haircutting technique here!
6. Texturizing
It involves cutting hair into different lengths in order to make different hairstyles. Long hair is able to appear less uniform or ragged shorter hair can be stylized to create a wild hairstyle or a mixture of short and long hair; it is possible to create trendy looks.
A lot of hairdressers use various hair cutting techniques to achieve the desired appearance.
Each hairstyle requires a distinct cutting method to create it, and by altering the way we cut, we are able to create a wide range of fashions. It's essential to use top-quality cutting scissors when making hairstyles.
Find out how to use texturizing scissors here!
7. Graduating
This method uses lines from the outer line to guide, and the hair is then kept from the head and cut away the bulk of the outer line.
Read about the short graduating haircutting technique here!
Additional Hair Cutting Techniques
We are able to distribute hair cutting techniques using the following methods and.
-
Razor Cutting: Razor cutting is a hair cutting method isn't often utilized. It is because it takes a lot of confidence and expertise. Razor cutting makes use of new blades to cut that makes the hair soft around the edges. The razor cutting technique is the best method of achieving the wispy look. It also makes the coarse and hard to manage hair easier to manage.
Read more about why hairdressers use razors to cut hair here! -
Dry Cutting: Dry cutting is most suitable to be used for curls hair and fine hair. Dry cutting allows hairdressers to see the natural motion as well as the weight of hair.
Read more about dry hair cutting techniques for hairdressers here! - Clipper Cutting: The term "clipper cutting" refers to cuts made by men using clippers that are powered by electricity. Hairdressers who provide clipper cuts also have experience in slicing hair over combs which holds and directs hair hair in place of fingers.
- Standard British Cutting: Pivot point cutting is a different name for this type of cutting. Precision and Standard British hair cutting strategies were developed using the classic Sassoon cutting strategies. This is the reason both are the norm for all cosmetology schools.
- French Cutting: French cutting incorporates hair's natural movement in the cutting. This is achieved by combining it with simple haircutting. The haircut is designed in complete harmony with the bone structure of the client and incorporates texture accents to give the emphasis and for an organic appearance.
- Precision British cutting: The style used is sometimes referred to informally as"the Sassoon method. Hair cuts that employ this method are crafted with precision and have sharp edges. The layers and blends of this type are the most recognized in geometric cuts but they are also the basis for perfectly executed cuts of every shape.
The Different Angles for Haircutting Techniques
There are generally four haircuts that can be described as 45 degrees, 0 degree 90 degrees, 180 degrees. Each of these angles are employed to make the haircut you want. Zero-degree cuts are also called the blunt cut, also known as a Bob cut. A 45-degree cut can also be known as a wedge cut or the triangle cut. 90-degree cuts are layer haircut, and a 180-degree cut can be described as shag.
Here are some additional aspects to consider:
- The Angle Used For Blunt Cuts is applied at 90 degrees to the hair.
- The Angle Used For Pointing is done at 60°.
- The Angle Used For General Hair Cutting is done at 30°C.
- The Angle Used For Texturing is carried out by bending the angle of 45°.
- The Angle Used For Thinning is carried out by bending the angle to 90°.
Blunt haircutting techniques

The base cut that hairdressers give you is called blunt cutting. It is the basic haircutting technique used to create a shape.
In short, when a hairdresser cuts hair across your hair with scissors, it’s called a blunt cut. Mr Vidal Sassoon first coined the term. He was popular for turning haircuts into a piece of fine art. And, hairstylists use blunt cuts to retain the hold of certain hairstyles these days. The blunt cut suits people who want a clean, sleek look.
However, there are a few things to consider when giving a refreshing new look to an old haircut. Look out for the best style suited best for your face. And, don’t feel shy to ask your hairstylist. As experts, they always provide you with the best haircut while considering your likes.
Read more about Blunt or Club hair cutting techniques here!
Useful tip on blunt cuts
“When it is about blunt cuts and texture, it depends on the texture of your hair. When you have thin hair, you might want a blunt cut. As a result, it adds more structure and weight to your hair. On the other hand, if you have heavy hair, a textured cut is the best thing you can do. That way, it gives your hair more movement and volume.”
What do blunt cuts mean?
In a nutshell, a blunt cut is a kind of haircut without layers. They are sleek on women with natural fine and straight hair. Or, add texture on hair types with more volume. When you get a blunt cut, it helps you from the damaged hair tip ends. Also, it improves your hair health without high maintenance on hair.
What about blunt cuts on thin hair?
A blunt cut gives you fine hair. And, it doesn’t matter whether you have thick or thin hair. They make your hair look super lush. Blunt cuts cater to any type of hair and give better results. In short, they are like one-size-fits-all.
Moreover, a blunt cut makes your hair thicker. A blunt cut makes your hair strands look denser instead of putting up more layers for volume.
Which blunt cut style is trending these days?
The blunt-cut bob without layer is trending among hairstylists. However, if you are a woman who likes long strands of hair and wants to get rid of the blunt ends, we got you covered. You might find it interesting to note that blunt cuts give you better results. And, it even works on all types of hair lengths and textures. All you need to do is find the right style that suits you better.
Is there any difference between blunt cuts and bob haircuts?
A blunt bob haircut is a type of short hairstyle. Hair is cut in a straight line with scissors at the ends. Whereas, bob haircuts have endless variations. Moreover, this hairstyle proves to go beyond limits all the time.
What is the opposite of a blunt cut?
The opposite of a blunt haircut is layer cutting. In layer cutting, hair is cut under certain angles to fall in a cascading style. Tapering is another hairstyling technique used to shorten hair with a graduated effect.
Moreover, blunt cuts give you precision without layers. They are used to retain sharp lines and hold the shape of a specific hairstyle. However, work with a convex or bevel edge scissor to achieve this hairdressing technique without hassle.
Recommended hair scissors for a blunt haircut
Blunt hair cut is a basic haircutting technique. So, most hair scissors are suitable. Offset handle types are the most recommended ones. That’s because they put less stress on the wrist and elbow when working. Also, basic hair scissors with a good symmetric shape are recommended as well.
Easy steps to perform blunt cuts
Step 1 – Give the client’s hair a good shampoo. Also, use conditioner on the hair afterward.
Step 2 – Use a wide-tooth comb to detangle hair. Gently comb the hair according to the style that the client should be wearing.
Step 3 – Divide the hair into two halves by parting it from the center. Start from the front hairline and end towards the nape. Now, find the apex of the head. Next, make a parting from the apex and move it towards the back of each ear. Clip them to make 4 different sections.
Step 4 – Start cutting on the left side at the nape. You can take a horizontal parting of about one-fourth to half inches from the hairline. Make the head upright and comb the sections right from the scalp toward the hair tips.
Step 5 – Ensure the comb is in a horizontal position. Cut the sections straight across. Moreover, keep the scissors parallel and horizontal to the floor.
Step 6 – Now, repeat the steps on the right side as well.
Step 7 – Focus on the right side again and take another horizontal parting. Create another subsection like the previous one. That allows you to view through the new section. Comb the hair naturally and cut the desired length. Repeat the exact step on the right side.
Step 8 – Continue to work up from the back of the head. Switch between the right and left sections. And, using the subsections as well. Next, comb the hair into the falling position. Cut hair with very little tension on the scissor to match the guide.
Step 9 – Take a horizontal parting on the left side and part off a little section of hair from the back place the comb parallel to the floor and cut hair below the comb.
Step 10 – You have to repeat the steps on the right side. Cut similarly to the left side. Moreover, check whether both sides are even. And, make slight adjustments if needed. When you cut hair along the face, ensure that the hair falls on the side and not on the face.
Step 11 – Sweep the excess hair from the head and dispose of it carefully. Blow-dry the hair.
Step 12 – After that, make the client stand and check in front of a mirror. Check where the excess hair falls when the head becomes dry. Also, clean up hair at the neckline if there are any.
Chop cut or, Point Cutting

Chop cut is another haircutting technique where you comb little segments of hair by holding the hair between your fingers. And, you cut the points using hair scissors by pointing them towards the scalp. Chop cut is otherwise known as chipping cut or point cutting.
However, the result could be very chunky or subtle. Also, it depends on the depth and width of the points cut. Chop cut adds texture to your hair. Moreover, it helps to remove and balance thick hair. A long convex edge scissor might be great for this type of haircut.
Sometimes hairstylists use the method to create a shape on the hair instead of the blunt cut. Also, chop cutting is used to create delicate textures of hair from their ends.
Read more about chop and point haircutting techniques here!
Professional advice on chop cut
It is good to chop cut each section a bit longer than the previous. As such, you can avoid an uneven base.
This amazing technique produces a big perimeter with a subtle texture. You can achieve a wave or curl, and keep the length you want.
Try to be patient when chop cutting. Sometimes it might appear to you to hold the scissor at an angle and remove all the hair at once. However, the hair lay better when you use a different angle and have patience.
What is the difference between a pointcut and a hair slithering cut?
When it comes to removing bulk or adding texture to your hair, there are two basic techniques.
Point cutting or hair pointing is a hairstyling technique where thin hair segments are combed and held by fingers. The points are cut with a scissor that points to the scalp.
Depending on the depth and width of the hair points, the result can be chunky or subtle. Point cutting is intended for shorter hairstyles. As such, they add texture to the hairstyle. Also, they balance the hair or remove them in bulk where the area is thick.
Simply slithering or hair slithering is another hairstyling technique where the hair is thinned differently. The thin hair segments are held by gliding them alongside their length and away from the scalp. The technique is best to remove bulk on long hairstyles and make the hair hang smoothly. Or, it can be used to produce a light texture on longer hair.
In short, both these haircutting techniques provide a variety of similar hairstyles. However, you need to understand what your hairstylist does whenever you visit them. In general, you shouldn’t texture your hair often. And, it should be done on every third haircut.
Point cutting or hair pointing
Hairstylists who perform these techniques often can remove too much hair. As a result, the hair looks stringy on long hair and ragged on short hair.
Keep in mind that it is your duty to intimate your hairstylist whenever you feel something wrong. He/she might be cutting too much hair when performing these texturing techniques. As a client, you have the authority to control what your hairstylist does with your hair. At any point, if you feel like stopping a hairstylist to know what is happening, you can do that.
Is there a difference between chipping and point cut?
There isn’t much difference between chipping and point cutting. The scissors are angled toward the inward segments of hair to cut pieces from the ends. However, there might be a difference between these terms because of how hairstylists use them.
Step by step process used in point cutting
Bring a section of hair in the back and cut it straight across. As such, it creates a dominant guide.
Now, drop the next section and use a pointcut to return to the previous hair section. Pointcut gives the hair a strong baseline. Also, it tends to create a little texture.
The difference between a good and bad haircut is the details while cutting hair. Point cutting technique texturizes the hair.
It helps remove bulk from the hair so that gradation and layers blend better. That way, it creates great movement in your hair. Both men and women can use point cutting. Moreover, when your haircut isn’t sitting in the right place, this technique comes in handy.
- Take about 1-inch hair section and comb it down from the head
- Hold hair about 2 to 3 inches from the scalp so that the hair falls out from your fingers. When you hold it too far, you might have difficulty cutting
- Position the hair scissors so that they remain parallel in respect to the hair
- Begin the haircut. However, you might not find out much hair removed with every cut. That’s because the technique is used for texturing and not removal
- You can remove more hair when you position the haircutting tool at a slight angle. The more the angle, the more hair gets removed
- Repeat steps 4 and 5 until you feel that it is fine
Recommended scissors for point cutting
During this haircutting technique, scissors are made to work vertically. Therefore, hair scissors with asymmetric handle are recommended. It gives you a higher degree of freedom.
The vertical curved blade hair scissors are especially recommended. That way, the design goes with the angle when you insert the scissor. Also, the usability of the scissors is great.
Stroke Cutting Technique (Stroke Cut)

It is another popular technique that many barbers and hairdressers use to create a shaggy hairstyle or curly hair with lots of volumes. Stroke cutting involves a pair of hair scissors where the hairstylist shakes the hair when pointing them horizontally or vertically.
In short, stroke cutting creates a feeling of lightness. Also, they adjust the amount and length of hair. Holding the scissors is another aspect of stroke cutting. Hold the scissors at a definite angle and shake them when cutting the hair.
You have to shake the scissors horizontally or vertically to create an added feel of lightness. Using only a cutting scissor for a haircut can be tricky when it comes to delivering a complete hairstyle without knowing all the hairstyling techniques. You can perform stroke cutting without using thinning scissors.
During stroke cutting, a heavy tension creates a feathered, bulky tip. Whereas a light tension creates a more feathered, flowy, and controlled look.
Stroke cuts are good for lighter and shaggy hair with lots of hair volume. That way, it gives the softer ends a more structured cut and a lighter look.
Dry Stroke Cutting Technique (Dry Stroke Cut)
You can perform a stroke cut on dry hair-types using a sharp hair scissor. Stroke cuts work better by texturizing the dry hair. However, it is not an easy haircutting technique. This is why only the high-quality hairdressers and hair salons perform this kind of haircut.
The shaggy haircut could be intimidating when you are trying to attempt it for the first time. From the texturizing techniques to the section elevation, it can be confusing. However, the shag haircut is versatile and personalized if you know how to perform it.
Recommended scissors
A hair scissor with an opposing handle and a convex edge blade is the right choice for this hairstyling technique. You need to shake the scissors horizontally or vertically while cutting hair. So, symmetric-type scissors are perfect. They have higher flexibility and provides a good balance to the scissor.
Slide cut or, slicing cut

The method of thinning or cutting hair that involves gliding the scissor and fingers along the edge is called a sliding cut. The sliding cut is useful for blending shorter lengths of hair to longer lengths and texturizing. Also, they are good for long hair layering and maintaining the weight of the hair.
You can cut hair by sliding the scissor while closing and opening the blades. Or, slide the scissor on the hair bundle while making the scissor open. Moreover, this technique is used to create short and long hairs for a unique texture.
In short, slide cutting is all about thinning hair at graduated lengths. The scissor blades are partially opened and are allowed to slide down the hair to make a beautiful cut. It can blend short hair lengths to longer, and remove volume. However, you need to perform the technique on wet hair. It’s important to hold the scissor properly while cutting.
Slide cutting involves removing bulk and texturizing hair by sliding the scissor. In short, held the opened scissor along with the hair. Also, the technique is called slithering.
You can remove less or more hair depending on the applied pressure on the scissor. It creates a smooth finish compared to other texturizing techniques. In short, the result is similar to razor-cutting.
Keep in mind that you need to apply gentle touch while performing this technique. Also, you should try your hands first on a manikin before reaching out to a live client. Most importantly, you need to hold your fingers steadily. That’s because you can clip out a chunk of hair accidentally.
Slide cut is effective on wavy, coarse, and long hair to remove the bulk. The technique isn’t good for curly hair types. The bends in curly hair can cause gapping on the hair and the result can be frizzy.
A slide cut is great for cutting hair for a smooth edge other than a blunt line. The hairstyling technique works fine with thick and long hair lengths. Also, a slide cut work wonders on long hair with shorter layers without even compromising the length of hair.
Read more about the slide haircutting technique here!
What does a slide haircut look like?
Slide cutting is all about sliding the scissor along the edge of the hair. And, the scissor blade remains open during slide cutting.
What is the purpose of slide cutting?
The purpose of slide cutting is to thin the hair. Also, the technique is used to create short layers on long strands of hair. Moreover, it creates a good texture to long and short hair lengths.
Common misconceptions
The common misconception about slide cut is that you can perform it on all kinds of hair. Extreme fine or thin hair doesn’t benefit from slide cut. The hair appears too thin. Also, wiry or damaged hair won’t benefit from this technique. It tends to produce frizzy hair.
Benefits of slide cut on hair
Slide cutting is used to create textures or layers. As such, it removes bulk and adds movement.
Slide cutting step by step process
Keep in mind that the slide cut technique works best with an intense sharp barber or hairdressing scissors.
- Use your dominant hand to hold the haircutting scissor
- Open the scissor blades slightly
- Gently glide the scissor into the hair. That way, it removes the bulk section in a smooth stroke
- Slightly close the scissor blade as you slide the scissor into the hair
- The result is an effortless slide cutting that cuts hair like butter
What are the recommended scissors for slice cutting?
Bamboo leaf blade types, which have a bigger line curve compared to ordinary ones, are the best suited for slide cutting. Also, other types such as the SDB series, NB series, CR-01F, and GXB-600A are some of the best types for sliding cut.
The GXR-58 is another recommended type known for its ease of use. It draws an arc to fall in line with the natural hair bundle curve and produce great results. The scissor blade consists of a vertical curve design like that of a bamboo leaf blade.
Hair shears used for slide cuts are convenient and versatile. Moreover, they are good for developing new skills and mastering different hairstyle techniques.
It is important to note that scissors used for slide cutting are not basic haircutting tools that beginners use. Aspiring hairstylists won’t find it easy to use them properly. However, with the growing popularity of creative hairstyles, learning how to use sliding cut hair scissors might be a good choice.
You can use slide cutting scissors to provide a less formal look to hair along with more flamboyance. These hair scissors can shift the whole volume of hair. They provide natural hair textures alongside a soft finish.
Dry cut technique (Dry Haircutting)

As the term suggests, dry cutting is when a hairstylist cuts your hair when it remains dry. And, wet cutting is when they are wet. If you want precision with strong lines, a dry cut is the best technique. The dry cut is often used to refine and correct hair shapes.
Certain dry cut techniques tend to adjust the hair texture with a sliding cut. When hairdressers use dry cuts, they can see the final hairstyle while cutting.
So, a dry cut allows the hairdressers to view the shape of hair while cutting. That way, it saves a lot of time needed to blow-dry the hair to find out if everything is fine.
Whether you are having a dry haircut or a wet haircut, it makes all the difference. This is what it means where this section says, “Dry haircutting allow hairdressers to see the exact shape of the hair while they are cutting. Also, it saves them a lot of time needed to wait until the hair is dried out.” Also, it means that you can see the shape of the haircut. In short, you can speak much before your request for a short bob cut turns into a pixie!
However, this is not the end. Dry hair cut is completely on a different role compared to a wet haircut. Different types of hair shapes aren’t visible when your hair remains wet. This includes waves, bends, cowlicks, and other little quirks. When the hair is dry, your hairdresser can work keeping in mind these shortcomings. The result is that you have a great haircut. This is something that all of us want to experience.
However, things can become complicated when it is about getting a dry haircut to women. And, on many occasions, they wonder whether they should take matters into their hands. Or, find an expert hairstylist that has relevant skill in this area.
But we don’t support cutting your hair all by yourself. That’s because there are all types of risks associated with that. Moreover, there are plenty of expert hairdressers that can perform a great haircut when your hair is dry. We are here to help you with expert tips on how to find your dream hairstylist.
Different types of hair such as coily, curly, or wavy become a lot harder to cut when they are wet. The reason is that you cannot tell where the curls might fall after your hair becomes dry again.
Therefore, if you are having a curly type of hair, making them wet while getting a haircut is not recommended. Moreover, when the hair is dry, the hairstylist can choose which curls to cut. As a result, the result is more promising compared to the result on wet hair.
Does a dry haircut give more control?
Simply put, dry hair tells the truth whereas wet hair is all about lies. When you cut wet hair, you need to leave the length to about 1.5 inches longer than what you have planned for. This is because of the amount of bounce it gets when the hair becomes dry.
It means that you can never know where the hair might land if you perform a haircut on wet hair. Dry cut on hair allows you to see how the hair might fall and makes sure there are no surprises when the guest leaves the place.
Can dry cut save time and improve your clientele?
Dry hair cut is a great technique to improve your clientele. This haircutting technique can be personalized and made specifically to suit the needs of every guest. The dry haircut is hard to replicate and everybody loves it. Therefore, if you know this skill, you are bound to get new clients. Also, they remain loyal to you.
Dry cutting is fast service. I have a lot of clients who visit me with their clean hair ready for a haircut. However, I flat iron them a bit to get the waviness and kinks out. After that, I am ready, to begin with, the work and finish the service with satisfaction.
A dry haircut is faster because you don’t need an extra step in your procedure. When you cut wet hair, you have to blow dry it to see the real density and volume of the hair. Also, you get to understand whether you did a good job.
But this is not the case with dry cutting. During dry cutting, you can see the detailing when you are cutting.
Can dry cutting fit in all types of hair?
It is wise to dry cut on hair that has fine layers. This is something that you can’t see on wet hair. Also, it becomes difficult to find out how the hair responds when the guest is sitting on the chair.
So, when you are working on curly hair, it is good to ask your client how they want to wear it. Whether they like to twist into a shape, diffuse, or air-dry it. Next, work on the texture. It is best to pick up hair sections in a way like you are sculpting the hair.
“It might sound crazy, but think of it as someone trimming small grass or bushes in the garden. This works in a similar process.” – Dilek.
If you have curly hair and want a round haircut, raise it to the elevation you want and clip away the hair.
Difference between dry cut and wet cut
There is no question that every expert barber or hairdresser has their preference. Also, clients have their own set as well. Therefore, what are the differences between dry and wet hair cutting techniques? Here are the differences.
- Every client has a unique hair type ad that has its texture. Dry haircutting gives you a clear understanding of the natural textures without hassle. These include density, movement, and cowlicks
- Wet hair is 50% more elastic compared to dry hair. Although it might be heavier, wet hair is less dense in comparison to dry hair. Hence, wet hair doesn’t give you proper density about the client’s hair. As a result, it causes mistakes while performing the haircut
- A dry haircut is a cheaper option for a barbershop or salon. That’s because it speeds up the cutting process. In short, you can see how long and dense the hair might be while you are cutting
- Dry haircutting gives you confidence about what you are doing. And, you don’t need to compromise on anything while cutting
- Because every client has a different hair type, you need to personalize every haircut that satisfies the client. A dry or wet haircut depends on the hairstylist. Also, it depends on what the client is looking for
Recommended scissors for dry cutting
It is wise to refer to every item aforementioned for hair scissors specific for each haircut technique.
For applying different types of hairstyling techniques while performing a dry cut, you can use a scissor with a thin blade. The thin blade edge makes it a smooth cut.
When you attempt dry cutting on hair, the scissor blades get damaged. So, scissors made with cobalt are the best. They provide strong wear resistance.
Scissors over comb (Scissor-Over-Comb)

This is another great hairdressing technique used by hairstylists across the world.
The technique here is to cut hair short at specific lengths using a comb. Scissor over comb does the same thing as the term says. But, it is not an easy technique to learn.
You can attempt it by having some practice. Here in this section, we discuss everything about how and why you should perform this haircutting technique.
Read more about the scissor over comb technique favoured by hairdressers and barbers here!
What exactly is a scissor over a comb?
You know that hair layering helps to distribute the bulk, especially the coarse hair types. A major portion of men’s haircuts is layered cuts. When the hair is cut short, attempting to hold the hair from the scalp into the fingers becomes impossible.
That’s the reason why men’s haircuts are done using clippers. However, you don’t have access to clippers on all occasions. Moreover, a hairstylist who is comfortable with a pair of scissors might not find it easy to work with clippers. Even when you work with clippers, you have to follow it up with scissors.
This is where the scissor over comb haircutting technique comes to play. It is easy to position the comb close to the scalp. And, you can use it to hold the hair. The comb works on behalf of your fingers and creates short layering. Using fingers, that might not be possible.
What exactly is the scissor over the comb technique
You can use this technique to create a uniform layer. The comb’s depth acts as a guide. Often barbers and hairstylists use their knuckles to make the length guide. However, with lots of practice, you can produce precise cuts and layers with this unique method.
The comb helps to lift the hair to the elevation you need and the scissors are held over the comb to perform the haircut. Sometimes, a tapered cut is done, where the hair layers become shorter while you move toward lower hairlines.
By using knuckles, the depth of tapering is monitored. You hold the comb in your hand, the knuckles rest against the client’s head and the end part of the comb rests on the scalp. In this way, it creates an angled cutting line.
The difference in comb angles
If you are thinking about different comb angles and it makes you restless, don’t worry. Sit down and relax because we understand this stuff better. Comb angle is similar to finger angle or section angle. In short, it controls the movement, building, and removal of weight. Here, weight doesn’t only represent hair length.
It includes how the hair moves and hair distribution as well. While the differences in weight might be subtle, the stakes are higher when you are working on short hair. So, let’s learn how to use the comb angle in the right way to get efficient and consistent results.
Scissor over comb: Horizontal comb angle
The scissor over comb technique is very common with barbers worldwide. Also, it is frequently used. In short, the horizontal comb angle means barbering scissor over comb. Having this skill is very important for performing different hairstyles both for men and women. Moreover, this is crucial for shorter hair.
This technique allows the hairdresser to cut close to the head and follow the hairline to achieve a precise haircut. While using clippers might give a shaved look, using scissors gives a soft hairstyle. When you need to create definite shapes, you have to use this technique.
Horizontal lines are better for keeping and maintaining weight. And, you can learn that with the help of finger and section angles. When you keep the comb in a leveled position, it is great for holding the weight. Now, that’s the only way we teach you how to use our combs. While it might be good for almost every application, it works great for maintaining weight.
If I have to depend only on the single comb angle, I may end up blending and refining some places. However, there is a good chance that knowing when and how to use other techniques and angles might help me achieve great results efficiently and quickly. Now, let’s look at the different alternatives here.
Scissor over comb: Diagonal comb angle
First, take a look at the picture. As it appears that after we turn our combs diagonally, the weight gets shifted with ease. Diagonal lines are good for blending or moving weight. Moreover, with diagonal lines, you can get things to become round. You know that a square consists of four straight lines. Most of the combs we have are straights as well.
And, if you want to make something round, you have to use several diagonal lines. That way, you can convert a square to a stop sign. Also, it is evident from the picture. When you use diagonal lines, the shape becomes round. This becomes effective when you work around the nape and behind the ears. Diagonal lines help the scissor and comb to accept the shape of the head. As a result, it helps the hairdressers to accomplish more work with the scissor over comb technique.
Scissor over comb: Vertical comb angle
Simply put, vertical lines remove weight to a great extent. The picture attached here gives you a clear understanding. When you vertically hold the comb, it might not be good for keeping or holding any kind of weight at all. However, we know that it is quite difficult to try cutting in a vertical position all the time. Keep in mind that horizontal, diagonal, and vertical works well with the position of the head.
Therefore, when the client tits their head a bit up and down, it gets easier for the hairdresser to make use of vertical-diagonal or vertical comb angle. So, it is good to work in collaboration with your guest. If it produces amazing results, the guests might feel better. Also, it allows you to have healthy conversations with your guests and discuss the cool things about hairstyles that make you stand away from the crowd.
That way, your guests would come to know about how we love to do things differently and how we are serious about our work. However, don’t forget that this is general information. Also, the comb angles that we are discussing relate to head shape and not the floor. The fall of the hair and the head position is what makes these angles work better. Moreover, take extra time while working around cowlicks and growth patterns.
Summary: Why is scissor-over-comb so popular for barbers and hairdressers?
Vertical, diagonal, and horizontal comb angles are different scissor over comb haircutting techniques. When you work with one or more scissor over comb techniques, it gives you more haircutting options. With more options, you can personalize results for your guests. All you need to know is the how, why, and when behind these types of comb angles. So, ask yourself: “What result do I want to achieve?” If we don’t use these comb angles at work, I guess we are going over the sections over again.
Over comb haircutting step by step process
- Make a horseshoe parting under the crown. The head shape varies about the horseshoe’s position.
- Starting from the center back, begin to comb the hair in an upward direction and try to establish a layer with one finger depth.
- Continue with the layering up to the front hairline.
- Next, dry the hair and begin the scissor over comb haircut technique.
- Start scissor over comb from the center nape. Use the wide teeth to reduce excess length.
- Tilt the teeth of the comb slightly and continue working to the sides.
- Fold the ear a bit to have better control of the area. Now hold the hair in the comb and work around the ear area.
- Repeat the technique and use the narrow comb teeth. Work on the short length and blend the graduation.
- Also, continue scissor over comb through to the sides.
- Take the texturizing scissor to work on the shape and soften the graduation.
- Remove excess hair outside the normal hairline using a trimmer.
- Use a barber comb to make the hairline tight. That gives your hair a natural finish.
- Now it’s time for radial parting. Make a vertical section in the hair and comb perpendicular. From the block, layering makes the length and point cut square.
- Work with the pivoting section and repeat the process to the radial parting.
- Next, take a section from the crown towards the front hairline. Elevate to about 90 degrees and by combing perpendicular. Use the guide to length point-cut square at the crown.
- Start working on the horizontal section on the top by using the guide to length. Elevate to 90 degrees, comb perpendicular, and point cut square to work on both sides.
- Repeat the steps and help retain the desired length on the front hairline.
- Continue working to finish at the sides. Comb the hair to natural fall and elevate to 45 degrees. Also, point cut the left out length at an angle from shorter to longer at both sides.
Recommended scissors for scissor over comb
Longer scissors that were manufactured for barbers are recommended scissors. These include CX-675 and Cobalt 7000. Also, we recommend GXG-14 and JGT-11G scissors. These scissors have a higher cut ratio of about 30 to 60% or 80%. In short, these scissors can pull hair for natural trimming with ease.
Thinning haircutting technique

Remove is another hair cutting technique where it involves finding heavy and thick hair clusters and cutting them out. Thinning haircutting technique gives a lighter feel and looks for the hairstyle.
No question managing heavy, thick hair is very difficult regardless of the hairstyle you are having. However, there are haircutting techniques that you can use to make hair look lighter.
Read about how to use hair thinning scissors to thin out thick and coarse hair here!
Thinning haircutting technique basics
Now you can make your coarse, thick hair nice and soft with thinning hair scissors. Thinning haircutting technique makes the hair look smoother. Also, it changes your normal haircut to reduce further chances of thickness.
To get started with, collect about 5.1 to 7.6 cm (2 to 3 inches) wide section of hair. Keep in mind that it is good to thin a small section of hair at a time. And, proceed on with the same amount of section all around the head. Start by holding the first section of hair and clip away the rest. Focus on the ends that you have to work on.
When the hair is short, you can take fewer sections. That’s because it is hard to thin hair closer to the scalp.
Make use of the thin hair shears to cut hair. Facing the serrated edge down, place the scissor about 5.1 to 7.6 cm (or, 2 to 3 inches) from the end of the hair. Also, position the hair scissor at an angle of about 45 degrees. Place the scissor over the hair and open them. Now, move them down to about 2.5 cm (1 inch) closing the scissor over the hair again. Continue these steps until you reach the full length of hair.
You can make the hair-thin underneath by facing the serrated edge downward. However, don’t start too close to the scalp. When you use thinning scissor, you have to make cuts about 2.5 cm (1 inch) from the ends of your hair. The hair might have a weird texture if you work too close to the scalp.
Next, comb the thin section of hair. Moreover, run the comb a few times to flush out the remaining pieces of hair. After that, have a look at the newly thinned hair. Compare each section of hair to see whether you have thinned properly.
If you feel that the hair is still thick, make a few more cuts with the thinning hair scissors. Furthermore, you can move slightly up if it feels necessary. That way, you can prevent cutting the hair at the same place several times.
Thinning haircut technique step by step process
Thinning shears might look like ordinary scissors. But it thins out a section by grabbing and cutting some hair strands and leaving others. Thinning shears don’t cut off a section, unlike normal hair shears. These shears are very effective on curly and thick hair.
Also, thinning shears are useful to blend layers and add textures. You can find thinning shears on superstores, beauty stress, or online. However, never use thinning shears on fine, thin hair.
- Comb or brush the hair until it becomes smooth and untangled. It is wise to use thinning scissors on dry hair instead of wet hair. That’s because wet hair accumulates and there are chances that you might remove more hair. People with curly hair should consider straightening their hair before using thinning shears. That way, it allows you to know where you are about to trim the hair.
- Take the thinning shear and place a section of hair between the scissor blades. Keep in mind to maintain a gap of about 3 inches between the scissor blades and scalp. Never use the shears at the ends of the hair or roots.
- Hold the shears at an angle of about 45 degrees. Gather about a 2-inch section of hair. And, glide the shear down the hair to make it thin. The number of cuts and the length of cuts depends on the overall length of the hair. After that, begin with another section of hair.
- Gather a small amount of hair and start thinning. However, if you feel that you need to thin more hair, handle them with care. This is to avoid removing too much hair. Repeat the process every 4 to 6 months.
Different types of hair thinning techniques use thinning or cutting scissors. And, the concept remains the same. Choose sections of hair to cut away with the thinning shears.
However, the advanced haircutting techniques focus on thinning specific hair sections to feel lighter and give more volume. Also, you can use thinning shears to blend hair for a normal fade or layered hairstyle.
Recommended scissors for thinning out hair
To have the best results, choose a pair of scissors with 30 to 40 thinning teeth. For texturizing, thinning shears with 20 to 25 teeth are the best. And, scissors with 10 to 20 teeth are perfect for chopping away larger sections of hair.
Scissor handles with symmetric types are the best suited for out-cut and in-cut. Another great option is the offset-type handle. They cause less fatigue in the elbow and hand.
Find the best collection of hair thinning scissors here!
Texturizing haircutting technique
Contrary to the popular belief, texturizing hair is something that you don’t attempt at home. In short, this is a unique technique that only your hairstylist can use. It’s not DIY. Keeping that in mind, let’s dig in straight and know how the experts do that.
There are lots of techniques to texturize hair. And, each technique demands you to use the scissors in a particular way to work on the hair. As a result, the looks can be anything from heavily layered to a smooth hairstyle.
- Slithering
- Pointcut
- Weaving
- Smooth cut
- Chipping
- Twist cut
Any kind of hairstyle can benefit from the texturizing technique. If you are a home hairdressing enthusiast, using texturizing techniques is an amazing way of achieving trendier hairstyles. You don’t even have to visit an expert hairstylist.
You can thin your hair if it is thick. Hair that sits flat can be improved with added volume. As such, the overall style gets improved with point cutting. It eliminates the blunt look on the hair when it has no texture. Keep in mind that it’s your style and you have to shape it according to your needs.
What is hair texturizing? Texturizing hair to create volume
The blunt haircutting technique gives hair an unnatural and uninteresting look. Therefore, hairstylists use several hair texturizing techniques to avoid the situation. These techniques add more movement and interest to a hairstyle.
In short, hair textures describe the way you cut hair. A haircut that has choppy, shaggy, or feathered layers is more texturized compared to hair cut parallel. Moreover, hair texturization adds interest and movement to a hairstyle.
Read about the difference between thinning and texturizing scissors here!
Hair texturizing technique basics
To achieve the best results, use thinning shears the same way line normal scissors. You can adjust hair texture with a slide cut, diagonal cut, vertical cut, or stroke cut.
While there are plenty of ways to add hair texture and eliminate bulk hair, one of the best ways is by using thinning scissors. Hair scissors designed for thinning consist of notches on one side. And, the other side remains smooth. The teeth remove less hair compared to normal hair shears. The angle and positioning of the scissor help to provide texture to the hair as needed.
As a result, it provides a well-groomed and more manicured hairstyle. Cutting the ends helps the hair to soften and blend. Moreover, working the thinning scissors on the mid-length of the hair can help to reduce bulk. However, this technique depends on the volume and texture of the hair you are about to perform.
That’s when a hairstylist uses a scissor or razor to cut hair at an angle. When it comes to textured cuts, I think about two things: Either you have long textured cuts or short textured cuts.
There is no question that short textured haircuts are popular. And, that’s because it adds volume to the hair structure in a natural way. However, if you want to add a volume to flat, straight hair, consult with the hairstylist. A bit of texture on the ends and long layers is a good way to go.
On the other hand, a long textured cut is great for curly or wavy hair. The cut allows the curls to hold and spiral. Moreover, be cautious when applying texturizing to de-volume hair. As such, it adds an awkward layer to the existing shape of the cut.
Hair texturizing technique: Point cutting
While there are lots of haircutting techniques available, li is likely that you have heard point cutting. So, what is it?
Point cutting texturizing is a type of finishing technique. The process involves holding the hair vertically and cutting them. So, what’s the result? A texturized, smooth haircut compared to a blunt cut.
If you want subtle texturization, you have to hold the scissors straight and cut them directly to the hair. Moreover, if you want added texturizing, cut the hair at a slight angle.
Small chunks of hair are cut at a time. Cutting bigger chunks gives you a shaggy, choppy look.
Hair texturizing technique: Twist cutting
This is another hair texturizing technique where you need to section thin areas of hair. Furthermore, you need to twist them as tight as possible from the roots to ends.
While the section gets twisted, you may cut the hair. When you release them, the hair becomes thin and gets a textured look.
Hair texturizing technique: Chipping
When you have thick hair that needs managing, this texturizing technique might help you a lot. You need to pull up a section of hair parallel to the scalp. After that, you have to chip away the mid-lengths smoothly. Chipping creates a dramatic texture to the look by thinning out the thick portion of hair. However, visit a reliable hairstylist while performing this technique. Or else, it can leave you with an undesirable look.
Hair texturizing technique: Slithering
As the term suggests, this texturizing technique is similar to what it appears. The process begins at the mid-lengths of the hair and slithers toward the ends. The scissor blade remains open with light pressure.
Apart from adding texture, this technique helps to smoothen the thick hair. Also, this technique adds volume to normal flat hair when you perform it close to the scalp.
Hair texturizing technique: Smooth cutting
The smooth cutting hair texturizing technique uses a hairdressing razor. However, keep in mind that this kind of razor consists of a guard. It prevents the cutting off too much hair.
Slide the razor from the mid-lengths to the ends in a single motion. That way, it thins and texturizes the strands of hair.
Texturizing bulky hair ends
Another great usage of thinning scissors is to give shape to your blocky, bulky ends by adding texture. To perform this technique, take a section of hair and pull it away from the face or body.
Next, hold the ends between the fingers. Use the other hand to apply the thinning scissors horizontally on the ends. Cut the hair inward from the outer side while shaping and thinning the ends as you proceed.
You can apply the technique through each section and cutting an inch from the outer side. Continue until all of them are texturized and thinned.
Texturizing the tips of hair
Use your hands instead of using combs to separate sections of hair to achieve soft ends. Try to cut away the ends to achieve a natural finish.
However, take it easy when you are cutting the mid-length section of hair. Or else, it can hamper your existing hairstyle.
Also, make sure to use texturizing scissors on the hair below the crown. The layers could become too short if you thin hair from the top portion of the crown.
Impacting on the line of bob
Using a straight shear, make a clean line at the start of the haircut. That way, it creates a guide so that you can follow when cutting with a texturizing shear. You need to hold down the shear with the tip pointed downward and the tooth pressing up against your skin. As a result, the scissor teeth grab the hair. Moreover, the hair stays in its place while you cut through the line.
How can you avoid holding texturizing shears incorrectly?
Correctly holding the texturizing shears depends on the haircutting technique. This is why it’s recommended to use reversible texturizing shears. That’s because you can use both the scissor blades on the hair. As such, you can use the scissor more ergonomically and comfortably.
Ensure the texturizing scissors don’t cause frizzy cuts
A good grow out of hair shows that the hair has a good cut. And, frizz stays out of it. You should think about texturizers as soft shears. Because they allow you to see where you are about to cut the hair.
There is less damage to the cuticle when you cut it slow. In our opinion, scraping the hair with a straight shear damages your hair more. Also, it creates more frizz after the hair grows out.
What are over graduating and over texturizing?
When you add a little graduation to a modern bob cut, it gives the haircut a certain amount of shape and lift. However, too high graduation leaves the hair look over texturized and thin.
It’s recommended to use texturizing shears and a wide-tooth comb to point cut. You need to cut about half to one inch inside the hair. If you cut low, you don’t interfere with the line of your bob. It gives the cut more life.
Recommended scissors for texturizing hair
Normal thinning scissors can’t help to texturize the hair. That’s because the hair gets caught while cutting.
The texturizing shears have 20 to 30 teeth. The GXG-20 and TX20 are the most recommended ones because the hair smoothly pulls out without getting caught.
The cut ratios are about 10 to 20%. The GXG-14 is another shear that has a cut ratio of 30 to 60%. Moreover, you can use it in the same manner.
Layering haircutting technique

Layering enhances and hair frames provide your hair with more volume. It is a great choice for any type of face shape. But this won’t work with all kinds of hair types.
This technique is perfect for people with wavy or straight hair along with a medium or fine tone. However, this technique is not for people with coarse or curly hair.
You might want to give layering a try but won’t like spending on an expensive haircut. So, what to do? With simple techniques, you can use this haircut technique at home. A layered cut is something you should try.
One of the easiest ways to layer long hair is to elevate a small section of the hair vertically to about 180 degrees and perform the straight cutting. Now, that’s the point where you will have to cut the remaining hair.
Lift the remaining hair segments into smaller segments that you can work with ease. And, cut the hair to the desired length.
Moreover, the effect will be a horizontal plane produced by the ends of the hair. Also, you get the layered style that goes well with the shape of the head. This haircut results in wavy and thick hair.
Layering long hair depends on your desired style in the finishing process. The long circle cut is another technique where the hair is cut to certain lengths. As such, when the hair stands straight out of the head, it forms a circular halo.
The beveled cut is where you can layer long hair. Also, it’s called a long layered haircut. The layers appear on the lower 25% portion of the hair.
The hair elevates to about 180 degrees during a long-layered cut. In short, the technique is all about cutting to a designated length and in a vertical manner. You have to choose the designated hair length before the cutting process gets started.
Take small hair segments at the top of the head to designate the length of the haircut.
Many people have long bangs or fringes. So, the length of the fringes determines the designated length. However, people with short fringe areas might want layers on their hair longer than their fringes for several reasons. Keep in mind that designated length is your stationary guide.
After you determine the length, bring small segments of hair to the stationary guide.
Next, cut hair to the same length. It is good to start with a stationary guide. Also, work from the front side towards the back of the head.
After that, move from side to side by changing between right and left. Work from front to back until you cut all the segments.
Many women performed haircuts by following a shortcut step. This trick has helped them to achieve a great cut with minimal experience. Make the person lie on a high countertop or table with the head hanging over its end in an upside-down manner.
Moreover, make sure that the head lay vertical but inverted. Now, comb down the hair and cut a straight plane. Most people don’t practice this technique. However, when you do it perfectly, it helps to speed up the cutting process.
Twist haircutting technique

It is another hairstyling technique popular among hairdressers. The Twist haircutting technique creates a clean and natural look for longer hair.
This haircutting technique uses thinning shears to trim hair, remove split ends and take out small amounts of hair. You can perform both cutting and twisting hair at home all by yourself.
Or, you may take help from a friend to produce a more professional look.
To move ahead with this haircut technique, you have to use a good hairbrush first. Use it to separate a small section of hair, say about a half-inch of your hair. And, you have to start that from the front of the head.
Take a small section of hair and twist them between your forefingers and thumb. Makes sure to take enough hair segments so that the whole length twists tightly. In short, hold the hair with a strong grip along with its tips and keep it twisted.
Comb the hair with the thinning shears through it right above your pinched fingers. Next, repeatedly and quickly comb the shears along with the hair.
Continue doing that until you have cut all the sections of hair that accumulated around the twisted section.
After that, continue with the twisting and cutting process until you have finished working with the hair over the head. Finally, brush the cut hair and style it as normal. That way, it brings out the desired appearance you have created.
How you can twist cut hair
This is how you can perform twist cutting. To get started with, take a section of hair and twist it out from its natural direction. That way, it helps to increase the elevation and direction on the outside of that specific section.
Begin at the highest point of the head. Grab the long cutting comb and section hair to the cornerback. After that, comb hair diagonally down to the center back. It creates a triangular section.
Proceed onto the other side and replicate the same sectioning of the hair. This creates two triangles. After you put them together, it creates a diamond-like shape.
What you have ended creating is a diamond-shaped area that surrounds the crown area. This diamond sectioning is a kind of flattering shape intended for the crown. Therefore, it allows the shapes of the hair to fall naturally on the back of the head.
Finally, you need to make a diagonal angle right off the crown area.
Useful tip – Grab the long cutting comb and insert it flat on the crown area. Now, that’s the area where you need to elevate the hair out of it.
Everything is over directed to the center of the diamond section. After you have established elevation of the crown area and direction to the center, you need to twist the section of hair.
Hold sections of hair between your fingers and move around the head towards the other side. When you do that, keep in mind to allow the hair to slip through your fingers. If you hold the section too tight, you might not get the correct twist cut effect.
When the section is twisted around nicely, you can find out that it stretches even further out of the natural position. Also, it increases the elevation and over the direction.
Take the shears and cut on the diagonal finger angle that resulted from the elevation.
You can try the 7 inches professional dry cutting shears for this purpose. Moreover, these shears make it easy for you to handle big amounts of dry, coarse hair.
When you grab a section inside the specific section that you made during the cut, you would discover that the hair remains longer on the end and shorter in the midway.
Now, that’s the result you derive because of the twisting movement you made earlier. That way, it won’t make blunt lines after the section gets released to its normal fall.
Slithering haircutting technique

Slithering or hair slithering is another haircutting technique used by hairdressers. In this technique, you use scissors to thin the hair.
Slightly open and glide the scissors along the full length of hair away from the roots. Slithering is a technique used to eliminate bulk from long hairstyles. It makes the hair hang smoothly or gives a light texture to a longer hairstyle.
Slithering is a unique way to thin hair using a pair of good scissors.
The scissor is slightly opened and constantly glided along the hair section and beyond the roots. In short, this is a style to remove bulk long hair and gives the long hairstyles a little lighter texture. This technique works great on thick hair.
During the slithering process, a significant amount of pressure is needed. Therefore, to achieve the best results, you have to grip the scissor handles lightly. This guarantees you the desired outcome. The scissor blade remains open from beginning to end.
How do you perform a slithering cut technique?
You can perform slithering by dragging a slightly open scissor along the hair section. Open and close them to produce layers.
This technique works better when you want to keep the hair long but lighten it without visible layers.
Graduate lengths of hair with shears to thin the hair. Next, cut the hair with a sliding movement while keeping the scissor blades partially open.
You can perform slithering on long hair that’s either wavy or straight and needs thinning towards the end of the hair to make a healthy, smooth look. Hold the hair out perpendicular to the roots.
The scissors are slightly left open and glided through the hair towards the end. It makes the hair thicker towards the scalp than the ends. This technique removes split ends and leaves the hair bouncy.
Conclusion: What are the best haircutting techniques?
There are plenty of different haircutting techniques used in salons, barbershops, and at home, but which ones should we bother to learn?
Mastering the basics to allow you to use all your scissors effectively is the first big step.
In this article, we covered the most popular hair cutting techniques that allow you to cut men and women's hair, shape, texturize, create volume, and even thin out hair.
Let us know if we are missing your favourite haircutting technique!
We use expert hairdressers, barbers and additional independent research from these sources to create the best articles for you!
- Slice Haircutting Education
- Blunt Cutting Hair Education
- Vidal Sassoon Graduation Haircutting Guide
- Hair Cutting Work Techniques For Hairdressers
- Scissor Over Comb Haircutting
- Layering Haircutting Techniques
- Dry Haircutting Guide
Tags
Comments
-
I find that opting for a technique you feel most comfortable with and then perfecting it as much as you can is the right way to go for most hairdressers. . Along the way, when you feel confident enough, experiment with other techniques, like slithering or scissors over comb. Practice makes it perfect!
-
The article ended up being longer than I expected, I kept scrolling and scrolling… Which haircutting technique do you think is easier to learn? My mom keeps asking for a haircut and I have severe anxiety just thinking I might mess up her hair. She currently has a layered lob but she wants it shorter.
Blog posts